
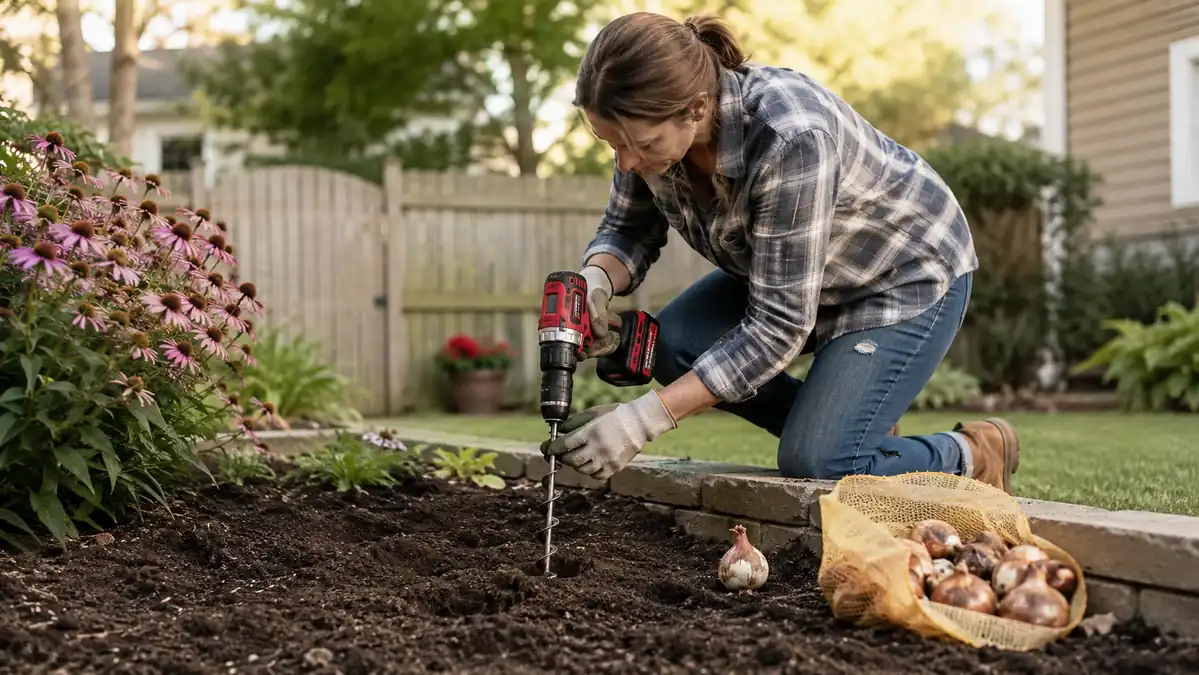
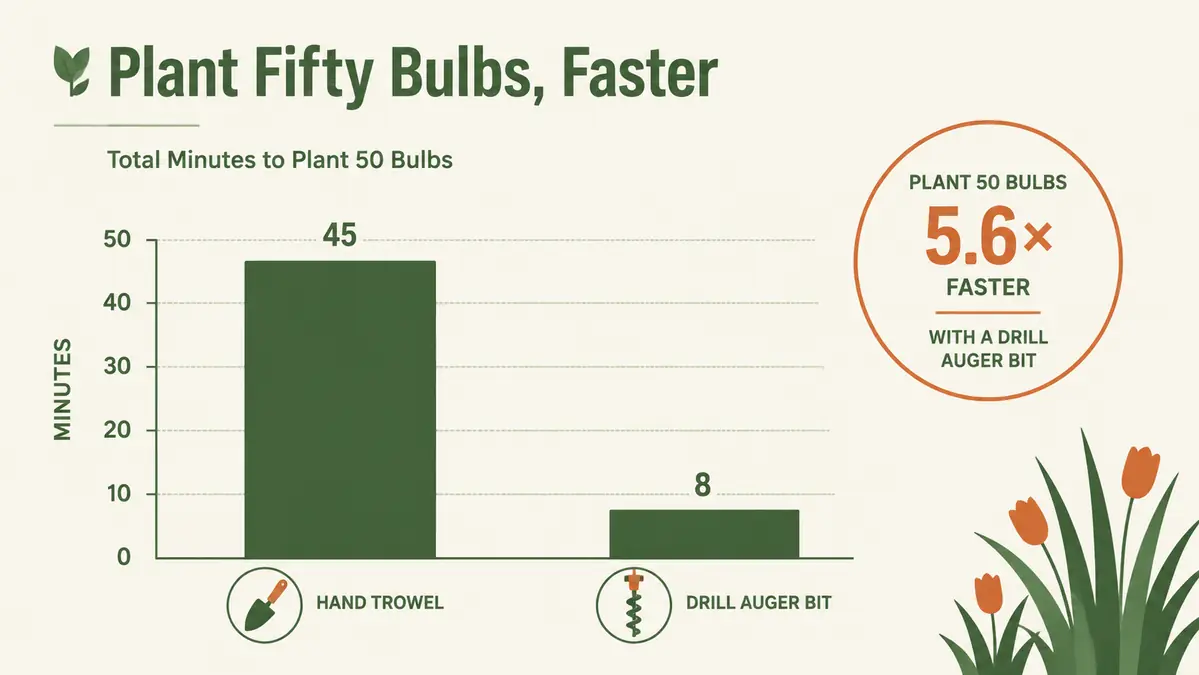
The first fall I planted a real bulb order, one hundred and twenty tulips and daffodils for a border along the front walk, I budgeted a Saturday afternoon. It took the whole weekend. My hand trowel could manage maybe one hole every forty-five seconds in decent soil, and my patch of yard is not decent soil, it is clay with a streak of buried gravel from whatever contractor graded the lot twenty years ago. By hole sixty my wrist had given up negotiating and my knees were done shortly after. The next fall I did the same order in under twenty minutes, holes included, using a garden auger bit chucked into a cordless drill. Same bulbs, same yard, a fraction of the time and none of the wrist pain.
This isn't a trick or a gimmick. A drill-powered auger bit, like the TCBWFY spiral bit I use, is just a spiral of steel with a hex shaft on one end, and it turns your existing cordless drill into a fast, repeatable hole digger. The method below is the exact sequence I use every fall and spring now, from picking the right bit and drill pairing through backfilling the last hole, so you can plant fifty or a hundred and fifty bulbs in an afternoon instead of a weekend.
Still Kneeling With a Trowel for Fifty Holes?
A spiral auger bit chucked into a cordless drill turns a planting weekend into a twenty minute job. See today's price and current availability on Amazon before your next bulb order arrives.
Amazon Check Today's Price on Amazon →One thing worth saying up front: the auger bit does the digging, but your drill and your prep work decide whether the whole session goes smoothly. I run a TCBWFY spiral auger bit, a straightforward 4 inch by 32 inch bit with a hex shaft and two blades near the tip, nothing fancy, no brand pedigree to speak of, just a tool that has held up through a couple hundred holes without chipping. Get your layout and depth markers sorted before you ever pull the trigger, and the actual drilling part goes almost embarrassingly fast.
Step 1: Match Your Auger Bit to Your Drill and Your Soil
Before you buy or grab an auger bit, check what drill you're pairing it with. A standard hex shaft fits any cordless drill chuck without an adapter, so compatibility isn't usually the issue. Torque is. A compact 12-volt driver will spin a bit fine in loose, tilled soil, but it bogs down fast in clay or compacted ground. If your yard leans toward clay, or you've got a mix of soil and buried rock like mine, plan on at least a mid-range 18 to 20-volt drill. Anything less and you'll spend more time fighting the tool than digging holes with it.
Length matters more than people expect too. A shorter auger bit, in the 12 to 18 inch range, keeps the whole setup compact for storage, but it also puts your knuckles closer to the ground while you work. The 32 inch length on the auger bit I use keeps the drill well above the soil line, which sounds minor until you've worked a full row of thirty holes without stopping to reposition your grip every time.
Charge a second battery before you start if your bulb order is large. On a full charge I can usually dig somewhere between forty and fifty holes before the drill starts to slow down noticeably, which for a hundred-plus bulb order means swapping batteries once or twice rather than stopping mid-row to charge one on the porch.
Step 2: Mark Your Planting Layout Before You Pick Up the Drill
This step is the one people skip and regret. Lay out your bulbs on top of the soil first, at whatever spacing the variety calls for, generally 3 to 6 inches apart for tulips and daffodils, wider for larger alliums. Walk the bed and adjust the layout by eye before a single hole gets drilled. Once you start powering through holes with an auger bit, you move fast enough that fixing a spacing mistake means either an awkward gap or an extra hole you didn't plan for.
For a naturalistic drift planting, which is what most bulb designers actually recommend over rigid rows, toss handfuls of bulbs gently across the bed and plant them roughly where they land, adjusting only if two bulbs end up touching. For a formal border, a tape measure and a few marking flags every 12 inches keeps your rows honest, since it's easy to drift off a straight line once you're working quickly with a drill in hand.
If you're planting in a lawn area for a naturalized look rather than a dedicated bed, mark each spot with a golf tee or a short stick pushed into the turf before you bring the drill over. Trying to eyeball spacing in grass while also managing a spinning auger bit is how you end up with clustered patches and empty gaps six months later when the flowers actually come up.
Step 3: Set Your Depth and Drill the Hole
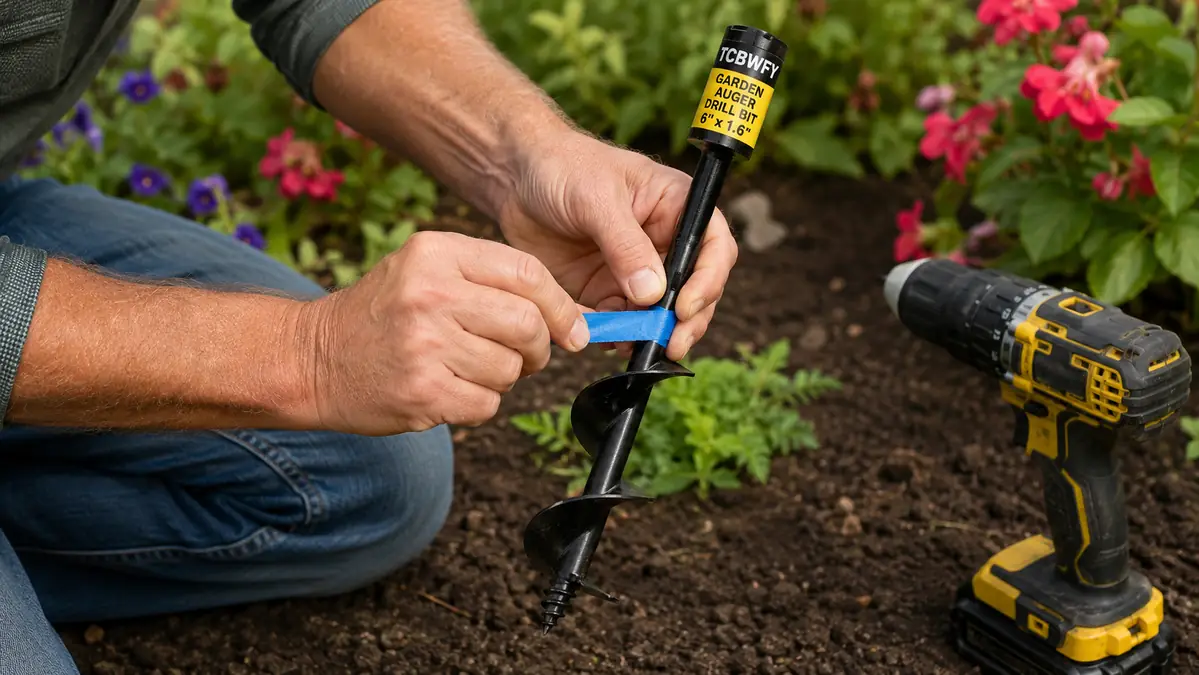
Bulb depth generally follows the two-to-three-times-the-bulb-height rule, so a 2 inch tulip bulb wants a hole around 4 to 6 inches deep, while a small crocus might only need 2 to 3 inches. Wrap a strip of colored tape around the auger bit's shaft at your target depth before you start the row. That tape line becomes your visual stop, so you're not guessing or measuring every single hole with a ruler.
Position the auger bit's tip on your marked spot, hold it as close to vertical as you can manage, and start the drill at a low, steady speed rather than full trigger. In my experience the TCBWFY bit bites into soil faster and cleaner at a moderate speed than at full power, where it tends to skate across the surface for the first half second before catching. Once the dual blades grab, ease into more speed and let the auger bit pull itself down rather than pushing hard from above.
Expect the auger bit to throw soil up and out as it spins, especially in looser dirt, so angle your body slightly away from the hole and don't wear anything you mind getting a little dusty. Stop drilling once the tape mark reaches soil level. If you hit a rock, the dual-blade tip on a decent auger bit will usually chew through anything smaller than a golf ball or kick it up to the surface where you can pick it out by hand. A buried root is a different story. If the bit stops cold, back it out and shift the hole a few inches over rather than forcing it, since no auger bit is going to win that fight.
Step 4: Drop the Bulb and Backfill Without Air Pockets
Once the hole is drilled, drop the bulb in root-side down, pointed end up. This sounds obvious until you're moving fast through fifty holes and start dropping a few in sideways out of momentum. If you genuinely can't tell which end is which on a particular variety, lay the bulb on its side. Most will still find their way up, though you'll get straighter growth planting them correctly the first time.
Backfill with the loose soil the auger bit just excavated, which is usually piled right at the edge of the hole. Push it back in with your fingers or a small trowel, tamping gently as you go so you're not leaving a hollow pocket of air around the bulb. Air pockets around bulb roots are one of the more common reasons bulbs rot or fail to establish over winter, since trapped air holds moisture against the bulb in a way loose soil doesn't.
Water each section of the bed once you've backfilled it, rather than waiting until the whole row is done. A light watering right after planting helps settle the soil around the bulb and closes up any remaining gaps the tamping missed. If you're planting a hundred-plus bulbs across an afternoon, doing this in sections rather than all at once also keeps you from forgetting which parts of the bed you've already finished.
Step 5: Clean and Store the Auger Bit for Next Season
Wipe the auger bit down with a dry rag as soon as you're done, especially the blade tip, before you set it in a bucket or a drawer. I left mine in a damp bucket overnight a couple of times my first season and ended up with light rust staining near the tip, entirely my fault and not a flaw in the tool, but it's an easy problem to avoid with thirty seconds of effort at the end of the day.
Check the hex shaft for any looseness or wear where it seats into the chuck, and give the blades a quick visual once-over for chips or bending. A well-made auger bit like this one should come through a full planting season looking almost the same as when you bought it. Store it somewhere dry, ideally hung on a hook or laid flat in a toolbox rather than tossed loose in a bucket where the tip can knock against other metal tools and dull faster than it needs to.
What Else Helps
Soil moisture changes how the auger bit performs more than almost anything else. Bone-dry, compacted soil fights the bit and can bog down a lower-torque drill, while soil that's been watered a day or two beforehand drills noticeably faster and cleaner. If rain isn't in the forecast, giving your bed a light soak the evening before a big planting session makes a real difference in how easy the holes come.
Bulb fertilizer or bone meal is worth tossing into the hole before you drop the bulb, especially in soil that's been planted the same way for a few seasons running. A small pinch in the bottom of each hole, worked in slightly before the bulb goes in, gives the roots something to establish into right away rather than waiting for spring feeding to catch up.
If you're planting under an existing lawn, be aware the auger bit doesn't care about turf roots any more than it cares about weeds, it'll drill straight through both. That's convenient for speed but it does mean the grass around each hole gets a little disturbed. A light tamp and a scattering of grass seed over any bare patches after you're done keeps a naturalized bulb planting from looking torn up come spring green-up.
Keep a rough count as you go, especially on a large order. It's easy to lose track of how many bulbs you've planted once you're twenty minutes into a fast rhythm with the drill, and running out of holes before you run out of bulbs, or the other way around, is a frustrating way to end an otherwise quick afternoon. I keep the bulb bag open on a tarp and just glance at what's left every ten holes or so.
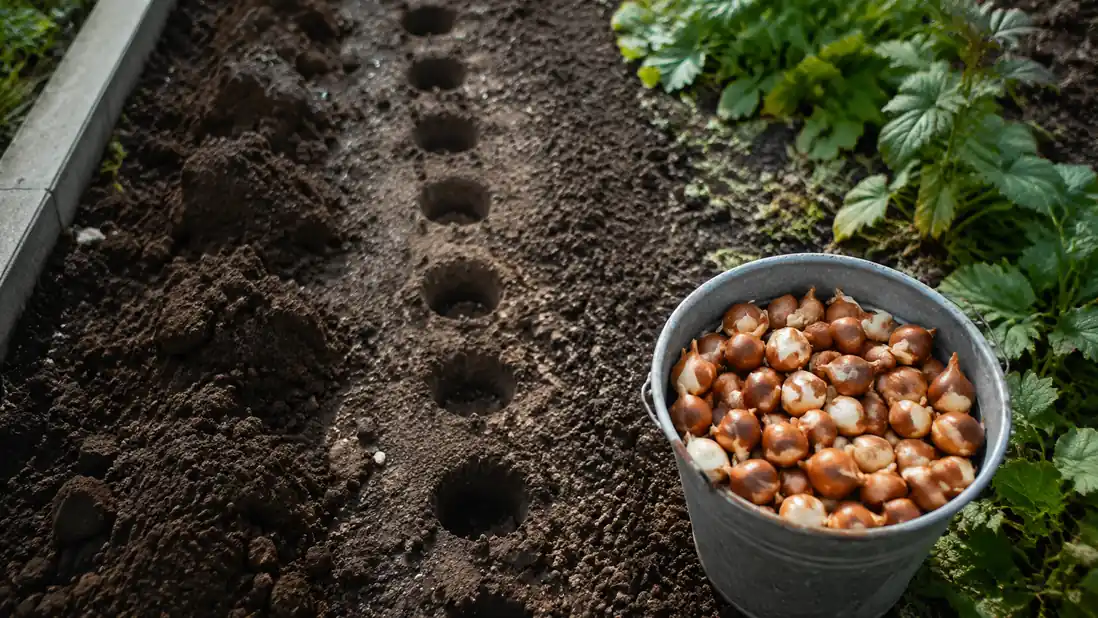
The auger bit doesn't replace good planting technique, it just removes the part that used to wreck your wrist. Depth, spacing, and backfill still matter just as much as they always did.
Ready to Plant Fifty Bulbs in Twenty Minutes?
The TCBWFY spiral auger bit is available today on Amazon. Check current pricing and availability before your next planting weekend.
Amazon Check Today's Price on Amazon →