
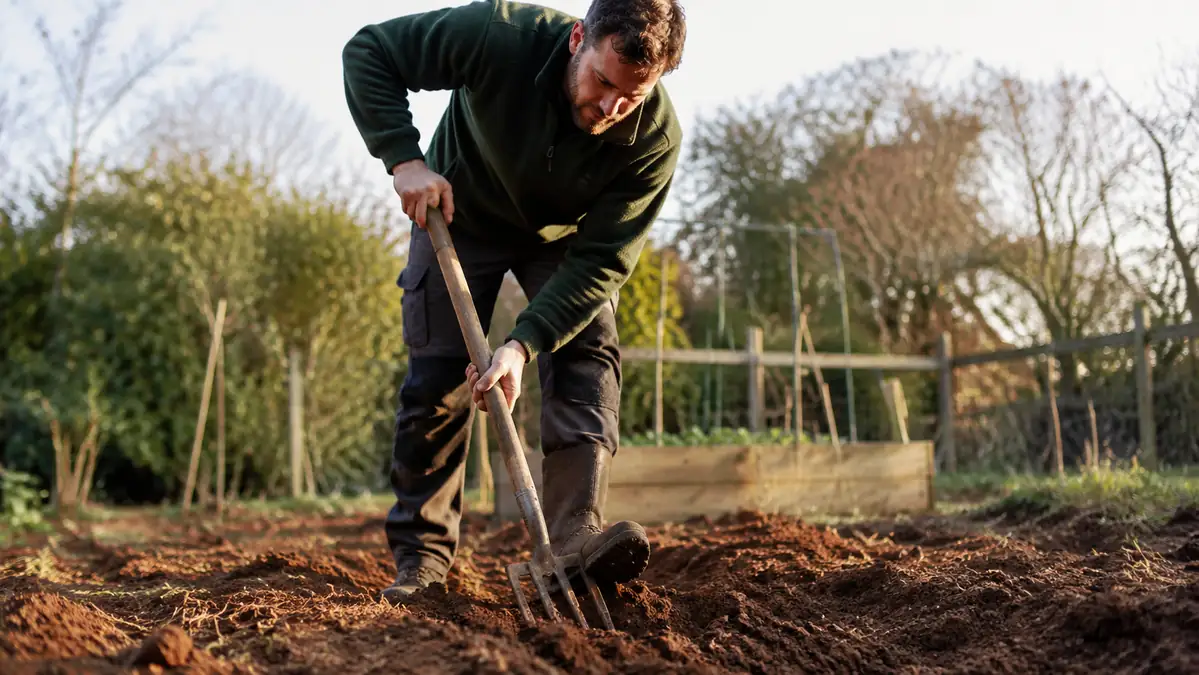
If you've ever tried to sink a shovel into hard-packed clay after a dry August, you know the sound it makes: a dull thud, the blade barely denting the surface, your foot bouncing off the top edge like the ground personally insulted you. I fought that exact fight for two summers behind my house, where the topsoil runs maybe four inches deep before you hit red clay that sets up like concrete every July. A rented tiller chewed itself to a stop on it. A flat digging spade just folded a little at the socket and skated sideways. What actually broke it up, and has kept breaking it up every season since, is a spading fork, specifically the Truper 4-tine model I've been leaning on for two years now. This is the exact method I use to aerate compacted clay soil with a spading fork, no tiller, no rented equipment, and no wrecked back.
Compacted clay is a drainage problem before it's ever a digging problem. Water sits on top instead of soaking in, roots hit a wall a few inches down and start circling instead of stretching, and anything you plant ends up stressed no matter how much you water or feed it. Tilling can actually make this worse over a few seasons, because it pulverizes the structure and leaves you with a fine powder that compacts right back down the first heavy rain. A spading fork works differently. It lifts and cracks the soil in chunks instead of grinding it, which is exactly what dense clay needs, and it does it without dragging a gas engine and a cord across your beds every spring.
The Tool That Actually Gets Through Clay
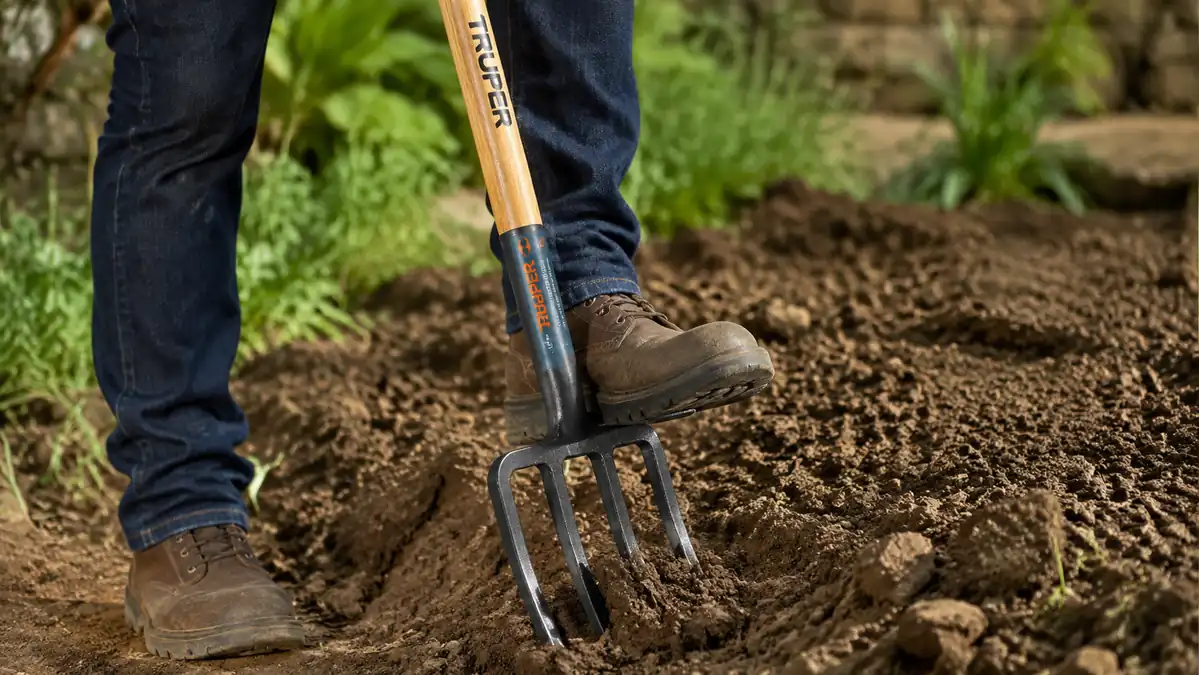
A flat spade skates off hard clay. A tiller chews itself apart on it. The Truper 4-tine spading fork is built for exactly this job, heavy steel tines, a wood D-handle you can lean your full weight into, and a footplate wide enough to drive it with a boot instead of your palm.
Amazon Check Today's Price on Amazon →How to Tell If Your Clay Actually Needs This
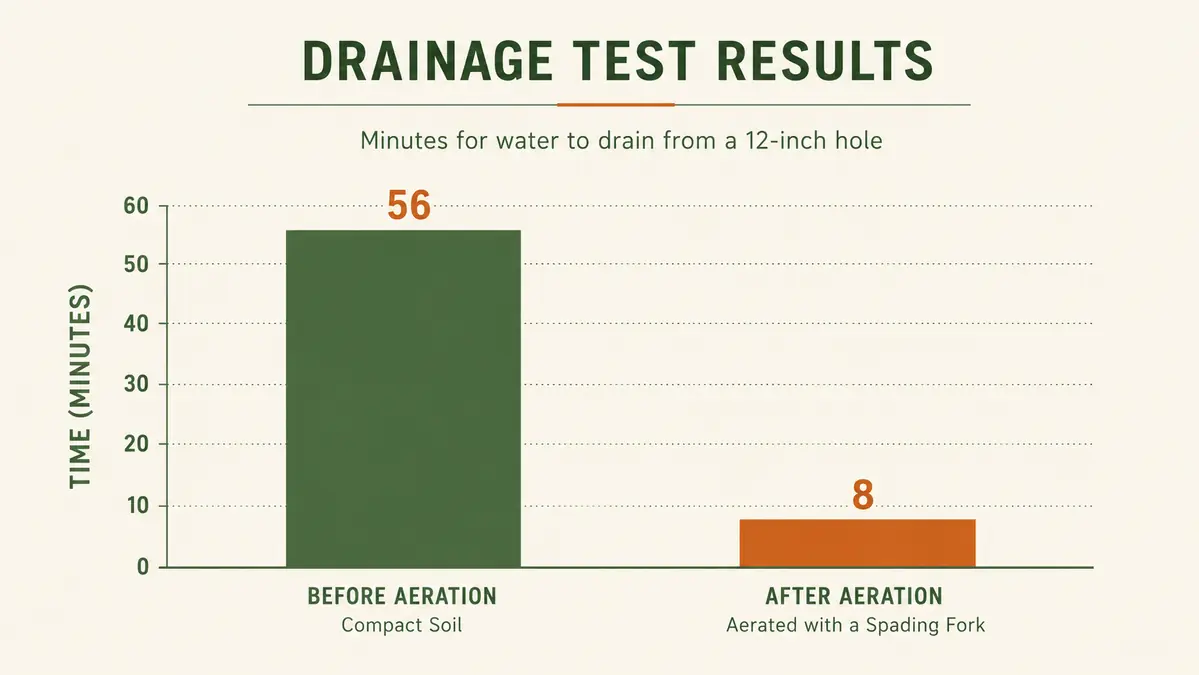
Before you spend an afternoon on a bed, it's worth confirming the soil actually needs aerating rather than just assuming. I run a simple drainage test first: dig a hole about twelve inches deep and just as wide, fill it with water, and time how long it takes to drain. Healthy loam usually clears in under an hour. My clay bed, before I started forking it regularly, took closer to four hours and sometimes still had standing water the next morning. If your hole behaves anything like that, or if you notice grass or weeds struggling in a specific low spot while the rest of the yard is fine, that's compacted clay telling you it needs opened up.
Another tell is what happens after rain. Compacted clay puddles on the surface for hours instead of soaking in within minutes, and if you push a finger into the soil a day after a storm and hit resistance within an inch or two, the ground underneath is still sealed. That's the pattern a spading fork is built to break, one grid section at a time, rather than trying to solve the whole yard with a single pass of a machine.
Step 1: Water the Bed Two Days Before You Aerate With the Spading Fork
Bone-dry clay is nearly impossible to fork, and soggy clay just smears instead of cracking. The window that works is damp but not wet, which usually means watering the area deeply two days ahead and then letting it drain. I run a sprinkler over the bed for about 40 minutes, then leave it alone. By the second morning the top few inches have softened enough that the tines can bite in without bending, but the clay underneath still holds its structure enough to fracture into clean pieces instead of turning to mud.
If you're not sure whether you've hit the right moisture level, squeeze a handful from about four inches down. It should hold a loose shape and crumble apart with light pressure. If it stays balled up and shiny, it's too wet. If it won't hold together at all, give it another day.
Timing matters more than people expect. I've tried aerating the same afternoon I watered and regretted it every time, the clay just gums up around the tines and drags a wet, heavy clump up with each pull instead of breaking cleanly. Two days is the sweet spot in most weather, but in a heat wave you may need three, and after a real soaking rain you might only need to wait a single day.
Step 2: Mark Your Grid and Set the Fork at a Straight Angle
I work my raised bed, roughly twelve feet by four, in a grid pattern rather than random jabs, because it's the only way to guarantee even coverage across compacted clay. I use two stakes and a string line to mark off rows about eight inches apart, which lines up with the spacing between the Truper's outer tines. Working off a marked line instead of eyeballing it keeps you from leaving untouched pockets, which is where roots hit a wall later even after the rest of the bed is loosened.
Set the fork so the tines are straight up and down, not angled. A common mistake is jamming it in at a lean to save effort, which mostly just bends the tines against the clay's resistance over time. Straight down, with your weight centered over the handle, is what keeps the tool intact through a whole bed.
Step 3: Drive the Tines Down With Your Boot, Not Your Back
This is where the footplate on a good spading fork earns its keep. Instead of pushing with your arms, plant one boot on the plate and step down through it, letting your body weight do the work the same way you'd drive a spade into turf. On my clay, the Truper fork usually needs two or three firm steps to get the full tine length, roughly ten inches, buried. A cheaper fork with a narrow, unsupported footplate will just hurt your arch after a dozen of these. That footplate width was one of the first things I noticed made a real difference once I switched over, and my knees notice it too by the end of a bed.
Go slow on the first few insertions of a new row. If you hit a rock or a root you can't push past, back the fork out an inch and reposition rather than forcing it, which is the fastest way to tweak a tine. I keep a small pry bar nearby for anything that turns out to be a buried root ball or a rock too big to work around.
Step 4: Rock the Handle to Open Fracture Lines in the Clay
Once the tines are fully buried, pull the handle back toward you about fifteen degrees, hold for a second, then push it forward the same amount. This rocking motion is what actually does the aerating, it's not the insertion, it's the leverage afterward that cracks the clay mass around the tines into separate pieces. You'll feel and often hear the soil give, a low crack rather than a smooth give like you'd get in loam.
Do this twice per insertion point, once rocking forward-back and once rocking side-to-side, then pull the fork straight up. Don't lever the handle down to the ground like you're prying up a stump. That's excessive force for what a spading fork is designed for and it's the move most likely to bend a tine on real clay, even a heavy-gauge one like the Truper.
Step 5: Walk the Bed in Overlapping Passes, Then Topdress
Move down each marked row in six to eight inch steps, repeating the drive-and-rock motion, then shift to the next row so your fork points slightly overlap the previous ones. On my bed this takes about 25 minutes for the full twelve by four foot section, which is a fraction of what a shovel or a fought-to-a-stall tiller ever managed. You're not trying to flip the soil like you would when digging a hole, you're leaving it roughly in place, just fractured and loosened.
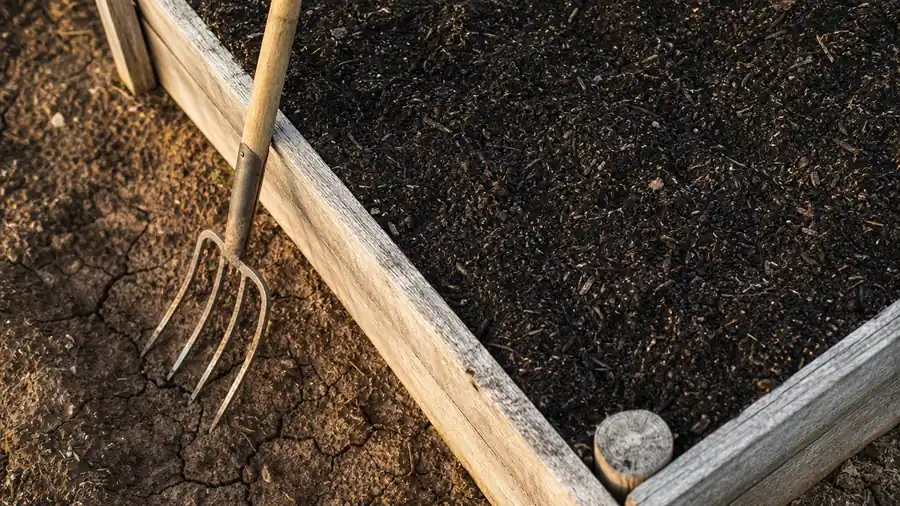
Once the whole area is worked, spread an inch or two of compost or aged manure across the top and leave it. Don't dig it in with the fork right away. The next watering and a few freeze-thaw cycles, if you're aerating in fall, will start pulling organic matter down through the cracks you just opened, which is what actually rebuilds the clay's structure over a season rather than just loosening it for a week.
I also walk the finished bed once more with a rake to knock down any high spots the fork left behind and settle the compost into the cracks rather than letting it just sit on top. It only takes a few minutes and it means the first watering doesn't wash half the topdressing off to one side.
What Else Helps Clay Soil Drain
Aerating with a spading fork isn't a one-time fix, it's a maintenance habit for clay-heavy ground. I go over each bed twice a year, once in early spring before planting and once in fall after the season's roots have died back, and I never till in between. Cover crops like clover or annual rye planted after the fall pass send roots down through the fracture lines the fork opened, which does more to permanently improve structure than any single tool pass could on its own. Gypsum can help with sodium-heavy clay specifically, but for most home gardens the fork-then-compost routine does the real work.
Raised beds and mounded rows also help, since they give water somewhere to go besides sitting on top of dense clay. But even a raised frame filled with good soil will eventually let roots grow down into whatever's underneath it, so the aeration work on the native clay below still matters more than most people expect when they build a bed and assume the problem is solved for good.
Earthworm activity is the easiest sign that the routine is working. The first season I forked that bed I barely turned up a worm anywhere near the surface. By the second fall, worm castings showed up in the topdressing layer within weeks of spreading compost, and the drainage hole I dug for testing cleared in under ninety minutes instead of four hours. That's the clay actually changing, not just getting loosened for one growing season and settling right back to where it started.
The fork doesn't flip your soil, it cracks it open and gets out of the way so water and roots can finish the job.
Skip the Rental Tiller, Get a Fork That Handles Real Clay
I've put two full seasons on the Truper spading fork, dozens of grid passes through the same stubborn clay bed, and it's still straight, still tight at the socket, and still the tool I reach for first. Check today's price on Amazon before your next bed prep weekend.
Amazon Check Today's Price on Amazon →